Note: For Azure Services, two Ports in the same region are required to provision the Service.
Services to Azure require a Service Key to be generated and readily available, before the connection is provisioned via CloudLX (Service Keys are generated via the Azure control panel and web tools – see Azure documentation - https://azure.microsoft.com/en-gb/documentation/articles/expressroute-introduction/ ).
Services to Azure require a Service Key to be generated and readily available, before the connection is provisioned via CloudLX (Service Keys are generated via the Azure control panel and web tools – see Azure documentation - https://azure.microsoft.com/en-gb/documentation/articles/expressroute-introduction/ ).
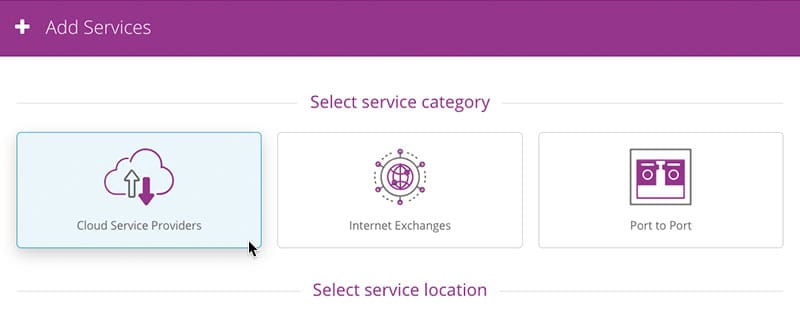
- Navigate to 'Services' and select 'Add Services'.
-
Select the ‘Cloud Networking’ tile.
-
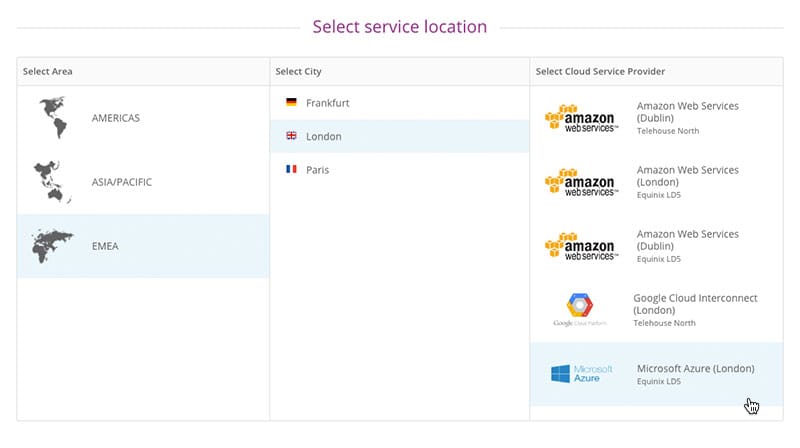
Select the Area, City, and the Microsoft Azure Service that you want to connect to.
-
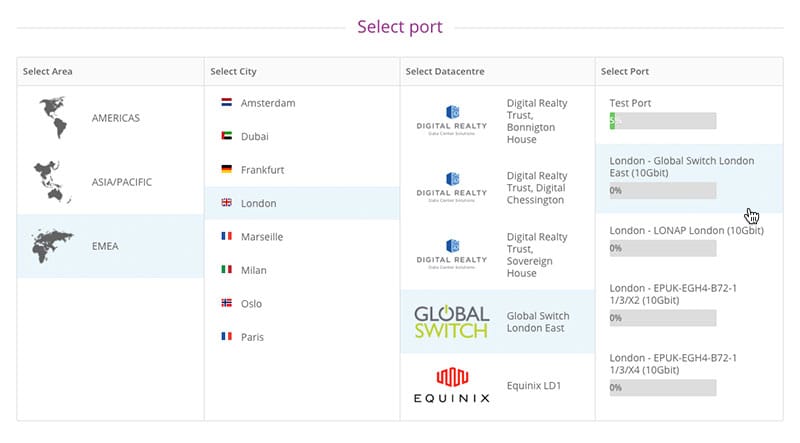
Then select the Area, City, DC, and port you want to connect from – this will generate the duration and speed sliders where you can configure the Service to suit your needs. Please Note: The region selected on the first Port will affect the options available to select for the second Port.
-
Select whether you'd like the service to be protected or not.
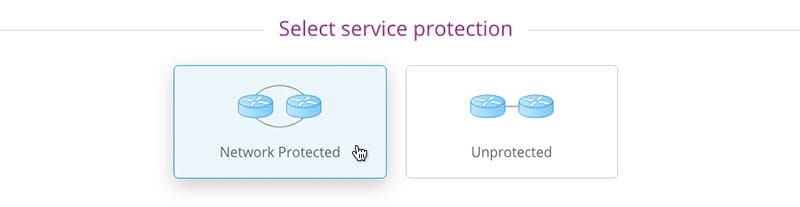 Please Note: Pricing may not always be available for both protected and unprotected services
 - Use the 'Select duration' slider to pick the duration (term) of the Service. You can either drag the handle or click on the labels to select the required value.
-
Use the 'Select speed' slider to pick the required speed of the Service. You can either drag the handle or click on the labels to select the required value.

-
Click the 'Configure and buy' button to get the Service provisioning details window. Please Note: The currency provided will vary depending on user account. Fill in the following information:
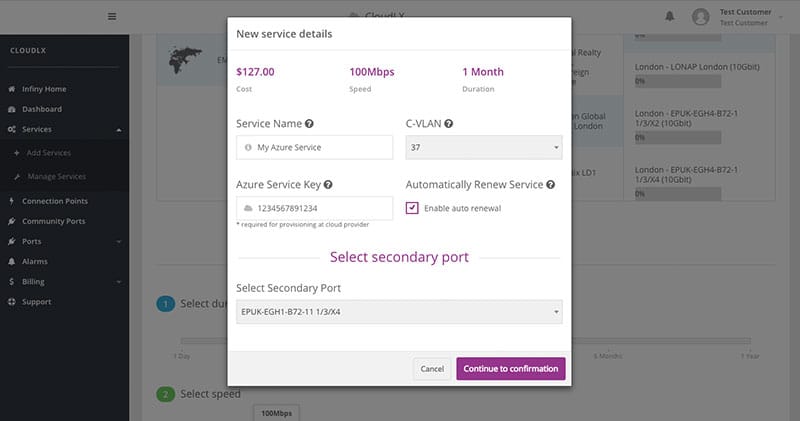
Field Description Service Name This is the 'friendly' name of the Service, i.e. where it can be given a descriptive name, relating to a Customer's context/use etc. C-VLAN This is the C-VLAN number (range: 2-4095) of the Service and must be unique on the Ports the Service is being provisioned to. CloudLX will validate the Customer Port and the CSP Port for availability. Azure Service Key Services to Azure requires a Service Key to be generated and readily available before the connection is provisioned via CloudLX. Service Keys have a UUID format, e.g. 123e4567-e89b-12d3-a456-123456789012. They are generated via the Azure control panel and web tools – see Azure documentation Enable Auto Renewal Leave this box ticked (default) for the Service to automatically re-new after the selected duration (term). If you want the Service to expire after the term, uncheck this box. Please Note: If left unticked, the Service will need to be created from new after expiration - After filling-in the C-VLAN number, the system will automatically start to validate the VLAN ID (and CSP details) across the network, during which the button ‘Continue to Confirmation’ will change into 'Validating'. Once the validation is complete, click the 'Continue to confirmation' button.
-
The Confirmation screen displays your selected options.
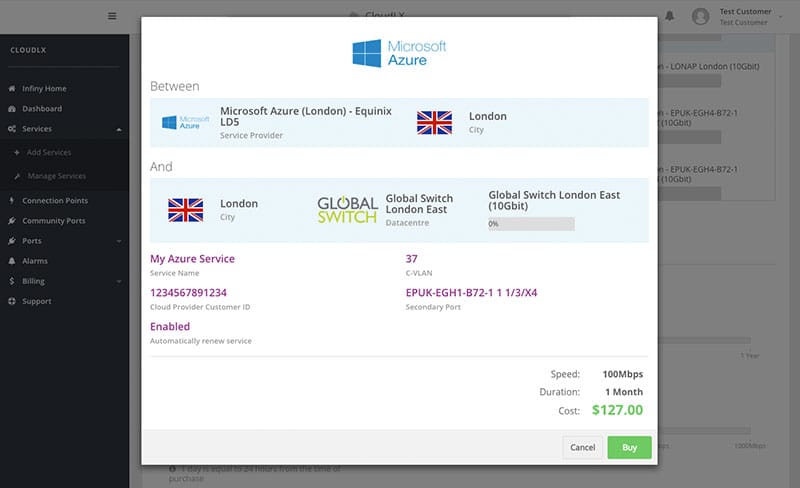 Click the ‘Buy’ button if all details are correct. CloudLX will then add the Service to the CSP and will direct you to the Service view.
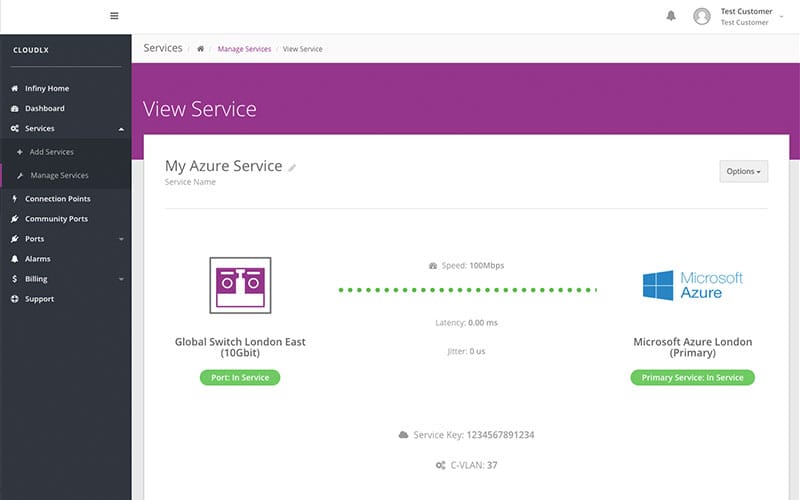
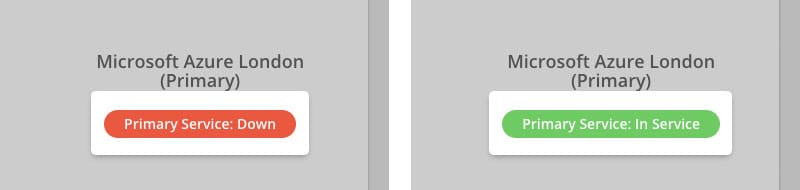
The service is successfully provisioned once the service icon changes from 'Service: Down' to 'Service: In Service' (further details on the service icons can be found in the section ‘Service Analytics’). Please Note: It can take up to 5 minutes to be provisioned. The graphs will not populate until the provisioning process is completed.