Provisioning a Service to AWS
Ordering an AWS Service
This section will describe how to provision a Layer 2 Service from a selected Port all the way to a given Customer ID on AWS.
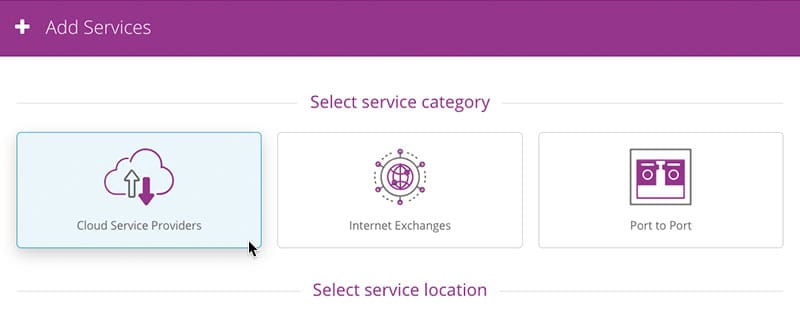
- Navigate to 'Services' and select 'Add Services'.
-
Select the ‘Cloud Networking’ tile.
-
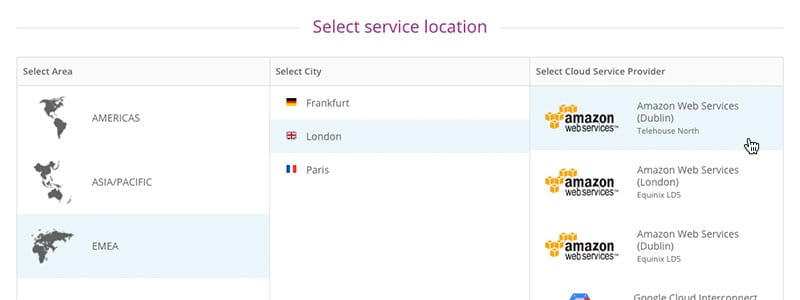
Select the Area, City, and the AWS Service that you want to connect to.
-
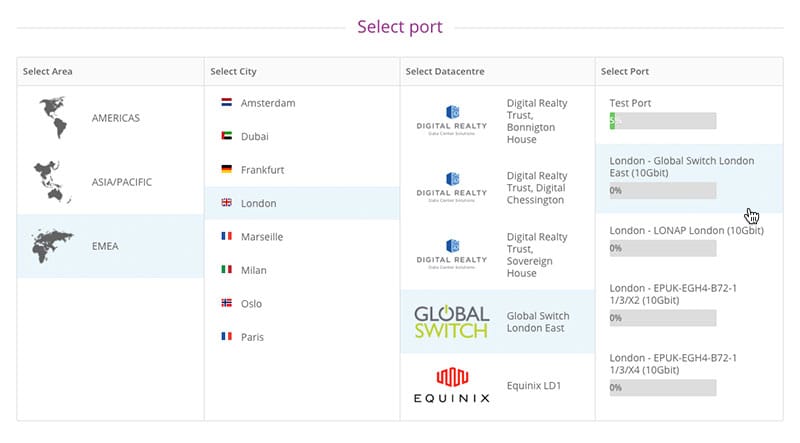
Then select the Area, City, DC, and port you want to connect from – this will generate the duration and speed sliders where you can configure the Service to suit your needs. Please Note: The region selected on the first Port will affect the options available to select for the second Port.
-
Select whether you'd like the service to be protected or not.
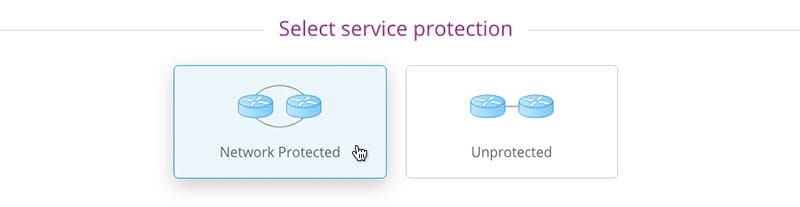 Please Note: Pricing may not always be available for both protected and unprotected services
 - Use the 'Select duration' slider to pick the duration (term) of the Service. You can either drag the handle or click on the labels to select the required value.
-
Use the 'Select speed' slider to pick the required speed of the Service. You can either drag the handle or click on the labels to select the required value.

-
Click the 'Configure and buy' button to get the Service provisioning details window. Please note: The currency provided will vary depending on user account. Fill in the following information:
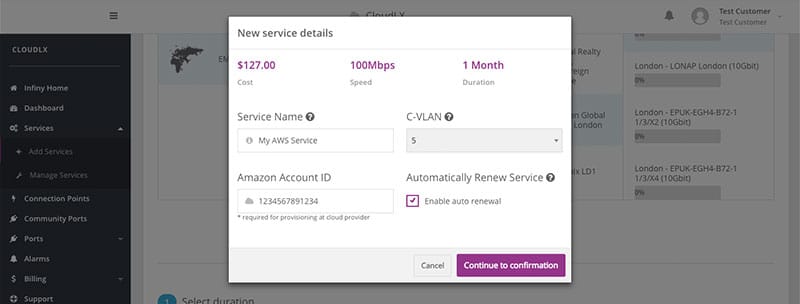
Field Description Service Name This is the 'friendly' name of the Service, i.e. where it can be given a descriptive name, relating to a Customer's context/use etc. C-VLAN This is the C-VLAN number (range: 2-4095) of the Service and must be unique on the Ports the Service is being provisioned to. CloudLX will validate the Customer Port and the CSP Port for availability. Cloud Networking ID This is the CSP User account to which the Service will be connected. This will be the Customer's own account. Enable Auto Renewal Leave this box ticked (default) for the Service to automatically re-new after the selected duration (term). If you want the Service to expire after the term, uncheck this box. Please Note: If left unticked, the Service will need to be created from new after expiration
After filling-in the C-VLAN number, the system will automatically start to validate the C-VLAN ID (and CSP details) across the network, during which the button ‘Continue to Confirmation’ will change into 'Validating'. Once the validation is complete, click the 'Continue to confirmation' button.
The Confirmation screen displays your selected options. Click the ‘Buy’ button if all details are correct.
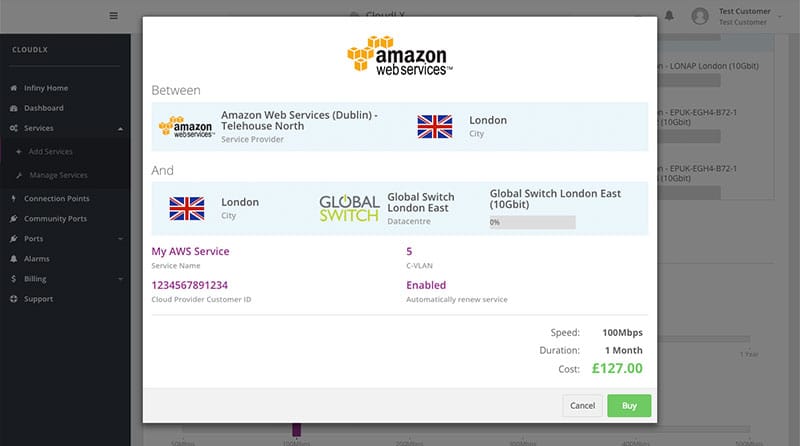
CloudLX will then add the Service to the CSP direct you to the Service view.
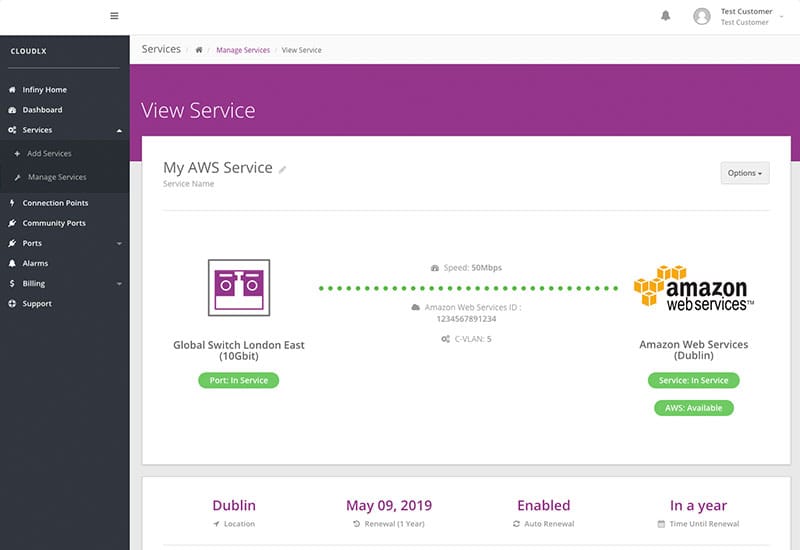
The Service is successfully provisioned once the Service icon changes from 'Service: Down' to 'Service: In Service' (further details on the Service icons can be found in the section 'Service Analytics). Please Note: It can take up to 5 minutes for the Service to be provisioned. The graphs will not populate until the provisioning process is completed.
Accepting the Connection in AWS
At this point, the User should log in to their AWS account, using the same 'Cloud Networking ID' used when ordering the Service, to accept and authorise the connection.
-
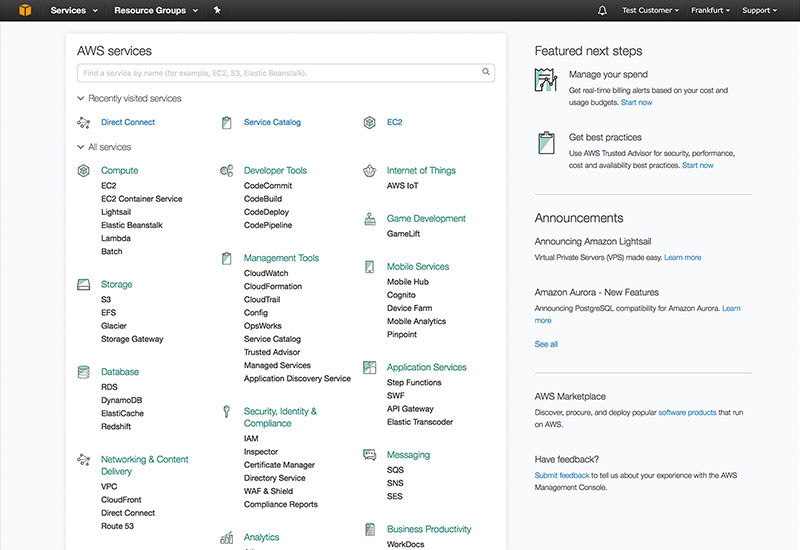
Access the AWS console via a separate browser tab/window, and enter the relevant credentials to log in. When logged in, the User will be presented with the AWS Console.
-
Before progressing any further, the User first needs to check that the console is operating in the right AWS Region (otherwise the connection will not appear). This setting is to be found in the upper right hand corner of the interface.
 In this example, the region needs to be changed from ‘Frankfurt’, to ‘Dublin’ (as the Service was ordered to 'AWS Dublin' via the CloudLX portal). Click on the current region and select the required region from the drop down.
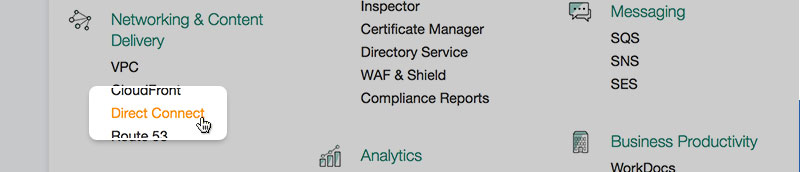
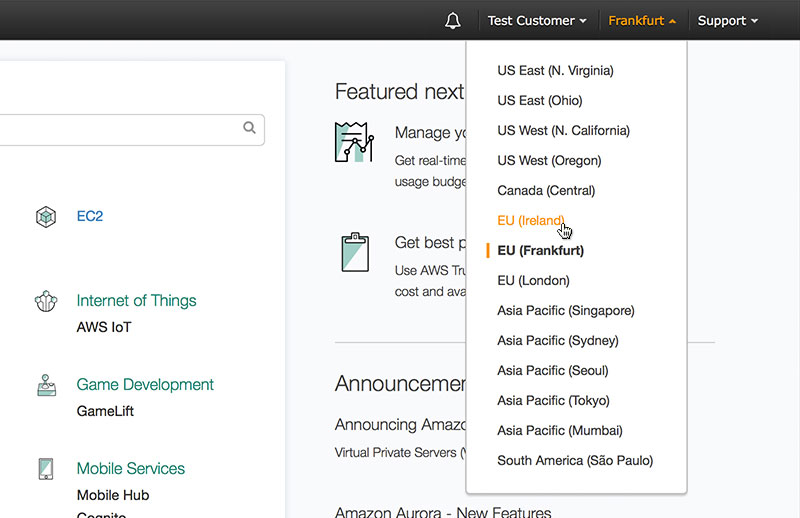 The selected region (i.e. Ireland) will now show in the upper right hand corner of the AWS console, and we are ready to continue into the 'Direct Connect' section, which is found in the lower left hand side of the AWS Console.
-
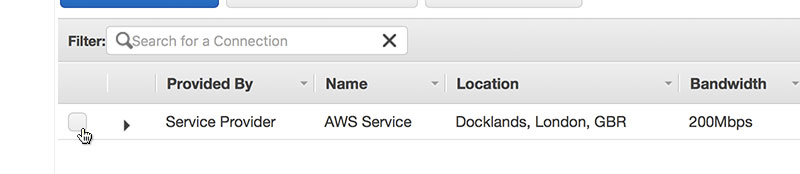
The Direct Connect section of the console will show the pending connection. Click the checkbox to select the connection.
-
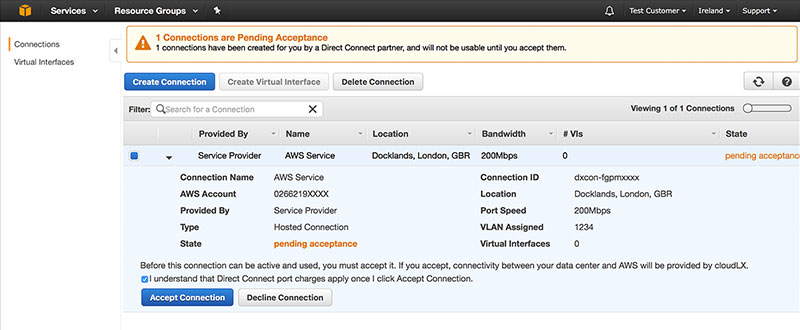
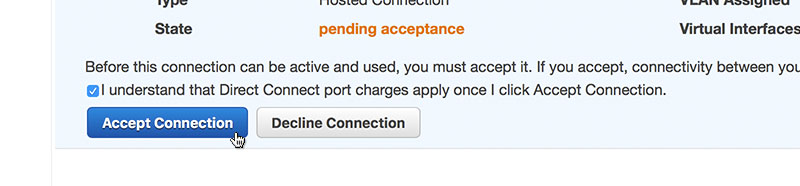
You'll see the details for the connection have been communicated from CloudLX to AWS via the API, and includes the details entered earlier, including Connection Name, AWS Account, Port Speed and VLAN Assigned.
-
To continue, tick the checkbox labelled 'I understand that Direct Connect Port charges apply once I click Accept Connection', then click the 'Accept Connection' button.
-
You should now see how the state, shown in the upper right hand corner, changes from 'pending acceptance' to 'pending' and finally 'available'. This process normally takes between 30 – 60 seconds. The screen AWS Console screen can be manually refreshed via the 'refresh' button.
 With the connection state in 'available' – return to the CloudLX portal.
The CSP badge in the upper right hand corner of the screen will now have changed from 'AWS: Ordering' to 'AWS: Available' to reflect the status of the CSP connection. After a few minutes the 'flat line' at the centre of the graph plot area will start changing as network statistics are analysed from the network.

The Layer 2 Service is now in-place and ready for the Layer 3 (IP and routing) configuration, as per the documentation published individually by each CSP.